How to make a sun map of your garden
There are many ways to map an area's sunlight exposure. Here are a few tips to make sure your plants get their moment(s) in the sun.
No matter how green your thumb is, the fate of your garden still hinges on a higher power. That's why, before getting into the weeds with a new flower bed or vegetable patch, it's wise to consult one of Earth's top arbiters of horticultural luck: the sun.
As in real estate, a garden's success stems largely from location. You have to pick the right plants for your climate, of course, but you also have to pick the right place to plant them. And while that's partly due to soil quality and moisture, those factors are relatively easy to manage. Sunlight exposure is a different story, especially in spaces where tall trees or buildings cast shifting patterns of shade.
Different plants need different amounts of sun — many vegetables like at least eight hours a day, and some shade-tolerant plants thrive in surprisingly dim conditions. Yet whether you want to grow sun-loving squash or low-light foamflowers, it's a good idea to seek solar guidance before you dig in. That means not just eyeballing how much light hits your yard in general, but learning more precisely where and when.
If you know the daily patterns sunlight paints across your property, you can give your plants an edge by matching each one's solar needs with a suitably lit location. (It can help with other projects, too, informing the placement of things like solar panels, windows, beehives, bat houses, fish ponds and chicken coops, to name a few).
The best way to measure sun exposure varies by garden and gardener, but even highly detailed sunlight maps shouldn't be too labor-intensive to make. Here's a look at several options, starting with one I can recommend from experience:
1. Shoot the shade.
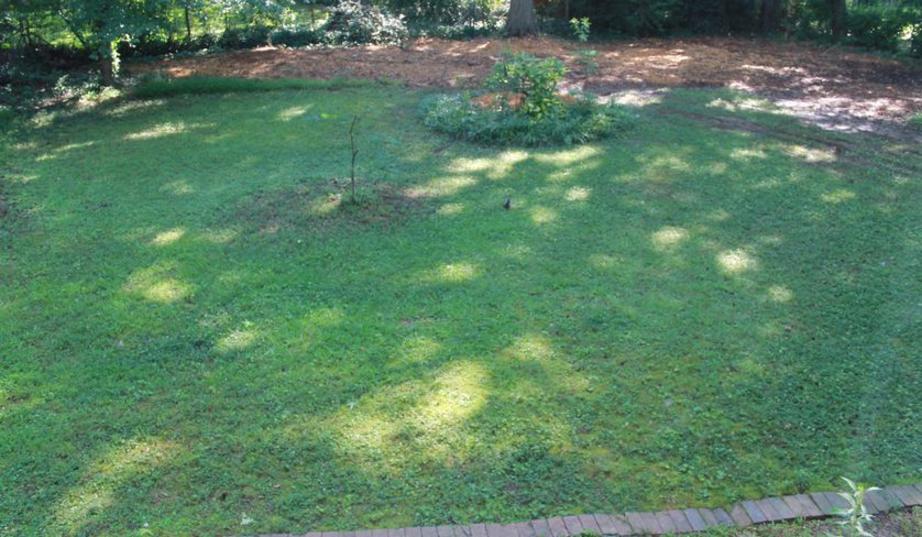
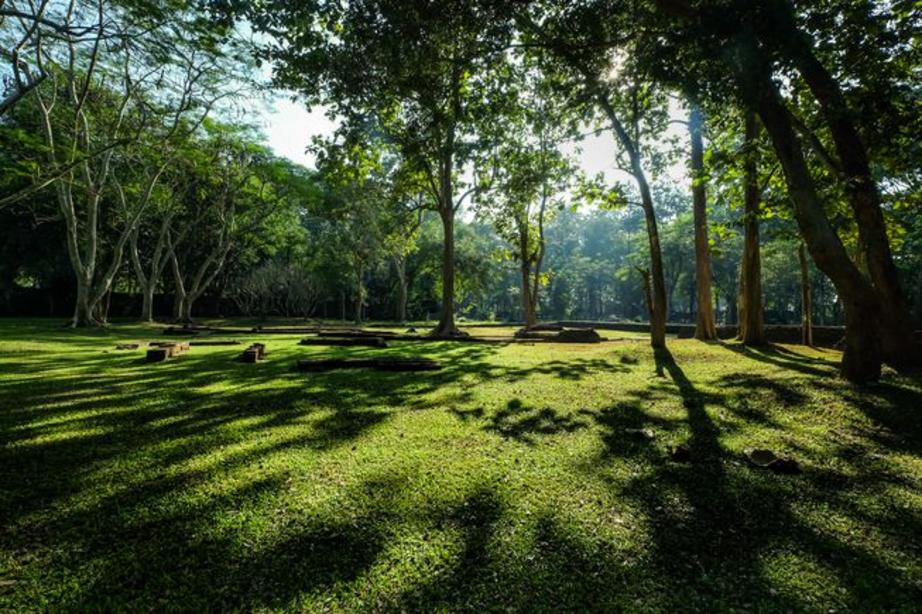
A yard this shady in the morning may still be surprisingly sunny over the course of a day. (Photo: Russell McLendon)
After years of gardening in full sun, I moved to a neighborhood with lots of huge trees in 2013. I like how they limit July heat and support native birds, but despite their benefits, tall trees also tend to throw shade on any would-be gardens below.
Enough sun shone through to preserve hope, though, so I decided to map it with an improvised process that worked pretty well. Not only was it easy, but it has since helped me find places to grow crops like tomatoes, squash, okra and cucumbers.
The only tools I used were a digital camera, a tripod and photo-editing software with layering and opacity features. (Adobe Photoshop and Illustrator are good options, but some free online photo editors work, too.) You'll also need a clear, safe vantage point for the camera, and at least one sunny day to collect data. Here are the steps:
• Set up the camera on the tripod with a clear garden view. An elevated vantage point might help (I used an upstairs window), but ground level is probably fine.
• Take photos at various times of day while it's sunny, and make sure the camera's position or settings don't change, since you want each shot framed, focused and exposed the same. You could do this all in one day or spread out over several.
• You could also do it automatically — some DSLR cameras have a time-lapse or interval-timer mode, for example — but if you pick a day (or days) when you'll be home anyway, it's pretty easy to just press the shutter every hour or two.
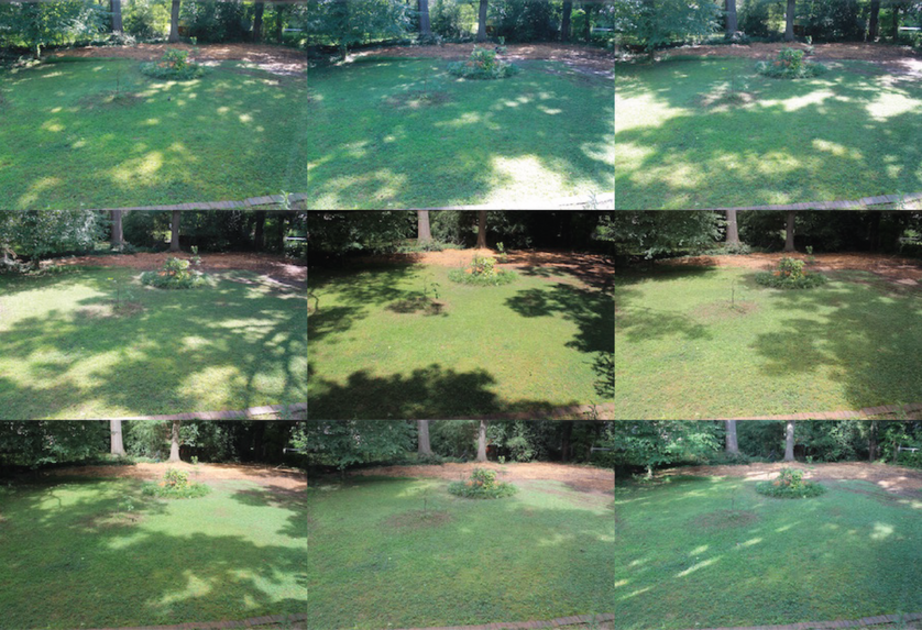
A few of the raw photos I took to create a map of sunlight exposure. (Photos: Russell McLendon)
• Try to capture a variety of sunlight patterns. You can use as few as two images, but more data means more detail. I used a photo from each hour of daylight, taken over several days, although a photo every two or three hours may be plenty. Note what time each photo was taken, either by writing it down or checking the metadata.
• Skip heavily overcast days. You don't need to avoid clouds completely, as long as there are visible sunlight patterns on the ground, but the goal is to map the effects of long-term surface features like trees, not temporary clouds or haze.
• You could stop after taking the photos, since a mix of time-stamped sunlight patterns already contains the data you want. If you're up for a little photo editing, though, a single composite image can be useful as a quick visual reference.
• To do that, upload the photos to a computer where you can edit them. Adobe Photoshop will let you open them as layers in a single document, and has an opacity tool to make them more transparent. I used Adobe Illustrator, which has similar features, but so do many other photo-editing programs.
![]()
This screen shot shows the stacking of partly transparent image layers in Adobe Illustrator. (Image: Russell McLendon)
• Once the photos are in one file, the last steps are to reduce their opacity and stack them up. I initially turned opacity down to 15 percent for all my photos, but doing it equally like that gives more weight to images at the top of the stack. In hopes of adding balance, I went back and made each layer slightly more opaque than the one in front of it. This wasn't scientific, but it did help the lower layers shine through.
• Make sure all the photos' edges are aligned, and then you're finished.
Here's my final version:
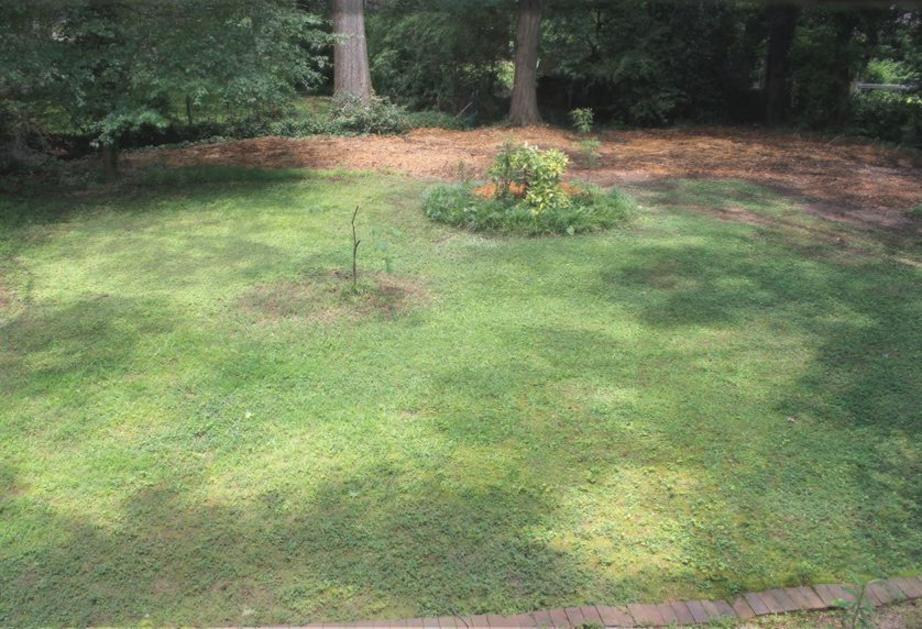
This is a composite image showing sunlight exposure over the course of a summer day. (Image: Russell McLendon)
Sun angle varies by season, so if your gardening plans extend into fall or winter, you may want multiple sun maps for various times of year. It's also worth noting that "direct sun" doesn't mean the same thing at every latitude, since sunlight hits Earth less directly farther from the equator. And, depending on the plant, sunlight can be more valuable at certain times of day: Many tomatoes are notoriously vulnerable to fungal diseases, for instance, and a blast of early-morning sun can help by drying excess moisture from their leaves. So even if you do make a composite sun map like the one above, hang on to your original time-stamped photos, too.
2. Sketch the shade.
If you don't want to mess with a camera or a computer, you could also just try an old-school version of the method above: drawing sunlight instead of photographing it.
Manually depicting sun exposure may be more labor-intensive than taking photos, but it's not hard labor — especially compared with actual gardening — and it might be a meditative way to spend time in your garden while honing your drawing skills.
The principles are the same either way, but if you're sketching sun maps by hand, you may want to start by making a template that represents your yard, including landscape elements for reference. Then you can make copies (either digitally or by tracing it) and draw various sunlight patterns on top of it. You could also color-code different levels of shade to add detail, or just make notes to yourself.
For more information about drawing your own sun maps, check out this guide from the Walden Effect, a Virginia-based farming and homesteading blog.
3. Calculate the shade.
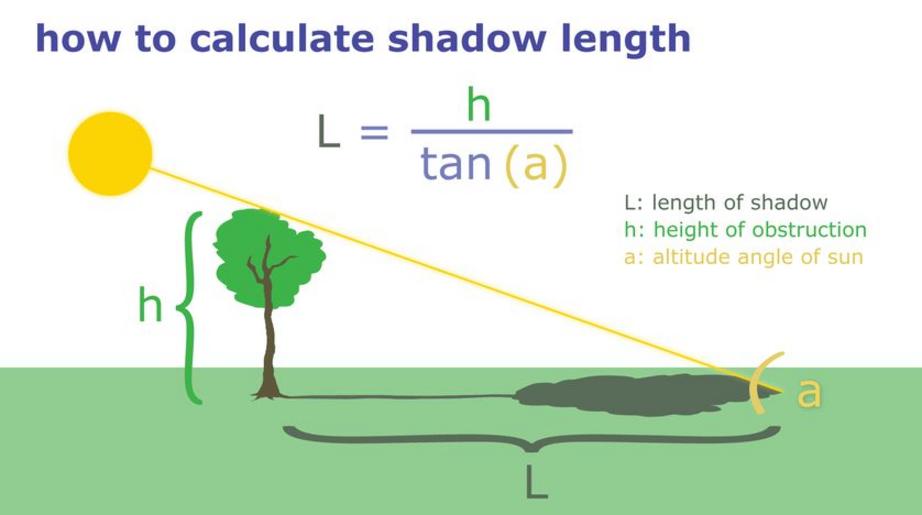
This method has some limitations, but it is possible to calculate shadow length based on the sun's altitude angle and the height of whatever's blocking it. In short, shadow length (L) equals the height of the obstruction (h) divided by the tangent (tan) of the sun's altitude angle (a), as this illustration explains.
This tells you the length of a shadow, but it may be impractical in a space with lots of trees. Still, it's simpler than it sounds, and it warrants at least a mention in this list. If you try it, this tool from the U.S. Navy can tell you the sun's altitude angle, and this guide has tips for calculating tree height. From there, you can use the tangent function on a scientific calculator. If a tree is 40 feet tall and the midday sun angle is 60 degrees, for example, the tree's shadow would be 23 feet long at noon.
4. Model the shade.

A screen shot of the FindMyShadow scene-drawing tool. (Image: FindMyShadow.com)
Of course, you could just let the internet do the math for you. Several online tools map the sun's path by date and location, including SunCalc and Sollumis, both of which use Google Maps. The University of Oregon's Solar Radiation Monitoring Lab also has a sun-tracking tool, displaying the data in a chart rather than an overhead map. Another option, FindMyShadow, not only calculates the sun's position and height for any place and time, but also has a scene-drawing tool where you can draw, move, resize and rotate objects to see how they cast shade during the day.
And for a slightly fancier take on this concept, you could also model your property's solar profile in SketchUp. There are several options for doing this, but Australian permaculture consultant and Milkwood school director Nick Ritar recommends DeltaCodes' Shadow Analysis plug-in. Here's a YouTube demo of that one:
5. Buy something.
Some mobile apps also offer sun-tracking services, including FindMyShadow, Sun Surveyor and Sun Seeker, which range in price from $2 to $15.
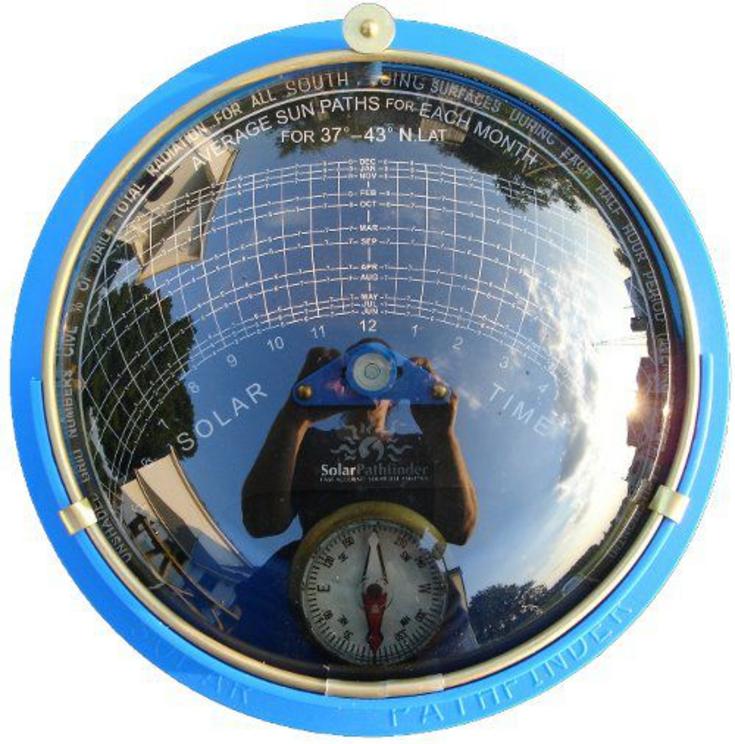
There are also physical tools you can buy to measure sunlight exposure directly — although some garden writers, like Robert Pavlis of Garden Myths, raise noteworthy doubts about their horticultural value. These include relatively cheap "sunlight calculators" that measure solar radiation at a single spot, like this one from Luster Leaf, or more sophisticated — and expensive — devices like the Solar Pathfinder (pictured), which uses a reflective dome to record insolation data without electricity.
***
These are just a few ideas for shedding light on sun exposure. If your sunlight map offers dismal prospects for sun-loving vegetables, it couldn't hurt to experiment a little anyway. Many crops can adapt to less than ideal conditions, so it may be worth trying a few different locations to see which works best.
However you enlighten yourself, remember light is only part of the equation, along with other factors like soil chemistry and moisture. It's wise to test your soil before planting, and to follow a deliberate watering strategy for every plant you grow.